Pages

Tuesday, August 28, 2012

Busy Week!!!

Last week was a super busy week for me. We had an anniversary, a birthday, a baby (I didn't personally have the baby) and parties!
Starting with Tuesday, August 21st, it was our 13 year Anniversary and Anderson's 6th birthday. He was born on our 7 year Anniversary weighing 7lbs. 7oz. I always thought I should have given him the middle name of "Seven".
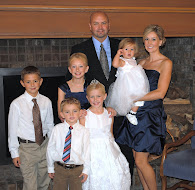
This was Brad and I a mere thirteen years ago.

Yes, Brad actually had hair back then! 
Happy Birthday to Anderson! I made these football cupcakes for him to take to his class. He was a little thrown off by the coconut grass, but after eating them, he said that was his favorite part.  
Which brings me to Wednesday. I got a call early Wednesday morning from my mother letting me know that Michelle and Dustin had just left for the hospital. She was only a week overdue, only...!I got crazy getting ready to go. As soon as my mother-in-law arrived, I was ready to leave. I made it up there just in time, so I thought. More like eight hours early! Poor Michelle had been in labor since 3am and didn't have little Claire Marie until 8:07pm. It was a long labor for her and I felt so helpless sitting next to her. It's pretty strange for me to be on the other side. I am finally an Aunt!
Welcome to the world Claire Marie! 

I'm a very proud Aunt!!! I miss her already! 
I came back home from Minneapolis on Thursday and had Anderson's friend party on Sunday. I decided to keep it simple and made a sports obstacle course in the back yard. While we were designing it and setting it up I got a big, enthusiastic hug from Anderson as he said, "You're the best mom ever! I love my party!" That totally made my day!
Anderson and his little friends before we said GO!
 I made "staff" shirts for the other kids out of a yellow plastic table cloth. They all helped the little kids get around the course. They were a huge help, thanks to Hailey, Grace, Jackson and Annaliese!

A quick shot of part of the obstacle course. They had to climb the rock wall on the play center, go through the tunnels, ride bikes to a tball station, throw a basketball in the hoop, more tunnels, a balance beam, blow bubbles and run through the trees. The kids all loved it and it kept them busy, outside of the house! Later that evening, we celebrated with the grandparents and rest of the family. I was exhausted by the end of the day and in bed before 8pm. I think Anderson had a great day and I'm thankful I have a break until the next birthday in December.

~ Misty

Friday, August 17, 2012

Where did my summer go??!!!

I have no idea where my summer went. I had high hopes for things with the kids, lazy days at the pool, picnics in the park, playing the rain (okay, I had no intention on playing the rain, but still) basically, just enjoying summer. I think it all started to go awry with the 100+ temps we had for so long. Couple that with a busy sports schedule, throw in the five kids, there ya go. I had three kids in golf, Jack had baseball, Hailey and Jack had track, Anderson had tball and Annaliese had swimming lessons. All of that lasted until the end of July. We barely made it through and it really cut into my pool time. Lesson learned for next summer.
Summer is gone, kids are back to school.
Hailey is in 6th grade, Jackson 4th, Annaliese 2nd and Anderson is in Kindergarten. They're super excited to be back in school. They walk to school and walk home, so for the first time in a long, long time, I don't have to drive kids to school. It is so nice to have them off in the morning and not have to go anywhere. I've always had to take kids to school or preschool.
And now, this year, it's just me and Piper. 
I can't wait to spend my days with her. She's already partial to me (the only one that is) and this will cement my status as her favorite! 
In addition to hanging out with Piper, I have a few plans for myself.
This is how I want to spend my mornings. Front porch, book, coffee, sun - does it get any better? I've already committed to increasing my reading, both fiction and non-fiction. I've been browsing through a book that's inspired me to get back to writing, Writing Motherhood. I'm not sure if this will find its way into my blog or not, but I'm looking forward to pen and paper and the rhythm of writing.
I had mentioned earlier that I was thinking about another cooking/baking project for my Block Party blog. I think I have most of the details worked out. I'm very excited about that and getting to be a better baker.
Brad has his own plans for me. He asked yesterday, the first day the kids went back to school, if I planned on doing anything on the house? Seriously? It's the first day! Give me a minute to enjoy it! I think his plans are for me to finish all the caulking, filling nail holes, painting and painting and painting. I'm super excited to get started on that, can't you tell?
I've got a lot planned, but if I were forced to take a nap every now and then, I suppose I wouldn't complain too much.


~ Misty

Tuesday, June 26, 2012

TIO Tuesday - BLT Pasta Salad

This past weekend we had the opportunity to host a family get-together with my mom's cousins from Colorado and Hawaii. I don't think I have ever met Deb, Joyce and their husbands before. They are slightly older than my mom and don't get here to visit much. My great Uncle Melvin and Aunt Ann also were able to come with their daughters, Kari and Kim. It was a last minute thing to have it at my house, but I was happy to host. Hailey and Jackson wanted to help decorate and I figured they would make posters or something like that. While I was preparing the BLT Pasta Salad, they went upstairs to get the decorations ready. When they returned downstairs about an hour later, they had made the coolest Lego creations to honor our guests. I was impressed as was everyone else. I think they did a fabulous job, and all on their own. Don't they look great?!

I did have to make a dish to share, and given my recent passion for pasta salad, I chose a BLT Pasta Salad, found in the latest issue of Cuisine at Home. I loved all the ingredients and I've been wanting to try out the campanelle pasta, so it was a perfect fit. I mean how can you go wrong when there are bacon drippings in the dressing? 
This is the smaller batch that I brought to our neighbors for them to try. I tried a small sample of this before putting the rest of it in the refrigerator without the bacon. I do this with all pasta salads so they can cool and the dressing has time to come together. I have to say, it was much better fresh, not chilled. Something happens to the dressing after it's chilled and it loses a lot of the bacon flavor that it has when it's fresh. So, while it was still a great salad, I'll know better for next time.

BLT Pasta Salad with creamy bacon dressing
Cook:
1 lb. dry campanelle pasta
1 lb. thick sliced bacon, diced
Whisk:
1/2 c. mayo
2 tbsp. minced shallots
2 tbsp. minced fresh basil
2 tbsp. cider vinegar
2 tsp. sugar
Salt and black pepper to taste
Stir in:
4 cups chopped romaine lettuce
4 cups halved grape tomatoes

Cook pasta in a large pot of boiling salted water according to package directions. Transfer pasta to a bowl of ice water, drain well.
Cook bacon in large non-stick skillet over medium heat until crisp. Transfer bacon to a paper-towel lined plate. Reserve 3 tbsp. drippings; set aside to cool.
Whisk together mayo, reserved drippings, shallots, basil, vinegar, and sugar in a large bowl; season with salt and pepper.
Stir in pasta, romaine, tomatoes and bacon; toss to coat. Season salad with salt and pepper.

*** I'm quite certain I broke a few copyright laws, but there are no links to recipes on their website, and I did provide the link to that, it counts a little - right? I'm slightly frustrated by the fact that I actually had to retype all that... Shhh, don't tell!
Enjoy!

~ Misty

Tuesday, June 19, 2012

TIO Tuesday - Chicken Enchilada Bites

I'm always looking for a good appetizer recipe, particularly one that I can throw together quickly with what I have on hand. We were invited to a birthday party right after an event we had last month. I had no time to come up with anything fancy. I had prepared chicken tacos for us to eat during our event and we had a bunch of the mixture left. I figured there had to be a way to make something for an appetizer out of it. I came up with a quick version of chicken enchiladas, in a bite size format. They were absolutely delish!  The recipe was a sort of combobulation (is that a word?) of different things I have made before.
I will try to recount it as best I can, bare with me:
Chicken Enchilada Bites
(recipe modified - drastically! - from Chicken Enchiladas)
Chicken taco filling (this comes from one of my favorite crock pot recipes - chicken breasts, can of rotel and one taco packet. Cook on low for a few hours and shred- Genius!)
Won ton wrappers
1/2 cup onion, diced
1/2 tsp. each - chili powder, garlic powder and cumin
1 cup shredded co-jack cheese, plus extra for topping
Cream cheese - 4 oz or so

Preheat oven to 350. Spray muffin tins with cooking spray, place won ton wrappers in each and bake 5-7 minutes.
Saute onions in oil until soft. Add seasonings and cream cheese, cook until cream cheese is softened. Add chicken taco mixture, and co-jack cheese. Combine all, use a cookie scoop to fill won ton wrappers and top with additional cheese. Bake for 7-10 minutes until cheese on top is melted.
Serve warm!
*** I originally tried it in the mini-muffin tins and they were too small. They are still a great bite size with the regular muffin tin.

This got rave reviews from everyone and will definitely be an appetizer I make again!


~ Misty

Tuesday, June 12, 2012

TIO Tuesday - Lemon Lemon Cake

Jackson has been begging me to make Lemon Cake. I'm not sure why exactly, I don't recall making it before or where he would have eaten it? He hasn't let up on it and even put it on our summer Bucket List. I finally submitted and bought a bunch of lemons. After finding this recipe earlier, we made it this morning. Jackson helped with just about everything. We only had a few hiccups with the recipe, my fault, not his.
This biggest downfall to this recipe is it took quite a while to put together. Part of that was because I had "help" and the other due to all the ingredients, measuring and prepping. It takes quite a while to squeeze and zest all those lemons!
We did two loaves, although they were slightly different in size. 
Final product, very lemony! Kids loved it, except Anderson. I don't think he likes lemon anyway, so it's not really a reflection on the cake. We will definitely make this again - after I get a lemon juicer!

Lemon Lemon Cake
Source: Baked: New Frontiers in Baking

FOR THE LEMON CAKE
1 1/2 cups cake flour
1 1/2 cups all-purpose flour
2 teaspoons baking powder
1/4 teaspoon baking soda
1 teaspoon salt
2 1/4 cups sugar
8 large eggs, at room temperature
1/4 cup grated lemon zest (from about 4 lemons)
1/4 cup fresh lemon juice
2 cups (4 sticks) unsalted butter, melted and cooled
1/2 cup sour cream, at room temperature
2 teaspoons pure vanilla extract
FOR THE LEMON SYRUP
1/3 cup fresh lemon juice
1/3 cup sugar
FOR THE LEMON GLAZE (OPTIONAL)
2 cups confectioners’ sugar, sifted, or more if needed
4 to 6 tablespoons fresh lemon juice
MAKE THE LEMON CAKES
Preheat the oven to 350 degrees F. Spray the sides and bottom of two 9-by-5-by-3-inch loaf pans with nonstick cooking spray. Line the bottom with parchment paper and spray the paper.
Sift both flours, baking powder, baking soda, and salt together in a medium bowl.
Put the sugar, eggs, lemon zest, and lemon juice in a food processor and pulse until combined. With the motor running, drizzle the butter in through the feed tube. Add the sour cream and vanilla and pulse until combined. Transfer the mixture to a large bowl.
Sprinkle the flour mixture, one third at a time, folding gently after each addition until just combined. Do not overmix.
Divide the batter evenly between the prepared pans. Bake in the center of the oven for 20 minutes, rotate the pans, reduce the oven temperature to 325 degrees F., and bake for another 30 to 35 minutes, or until a toothpick inserted in the center of the loaf comes out clean.
Let cool in the pans for 15 minutes.
MEANWHILE, MAKE THE LEMON SYRUP
In a small saucepan over medium heat, heat the lemon juice and sugar until the sugar is completely dissolved. Once dissolved, continue to cook for 3 more minutes. Remove from the heat and set aside.
Line a half sheet pan with parchment paper and invert the loaves onto the pan. Use a toothpick to poke holes in the tops and sides of the loaves.
Brush the tops and sides of the loaves with the lemon syrup. Let the syrup soak into the cake and brush again. Let the cakes cool completely, at least 30 minutes.
(The soaked but unglazed loaves will keep, wrapped in two layers of plastic wrap and frozen, for up to 6 weeks.)
LEMON GLAZE
In a small bowl, whisk together the confectioners’ sugar and 4 tablespoons of the lemon juice. The mixture should be thick but pourable. If the mixture is too stiff, add up to another 2 tablespoons lemon juice and whisk again, adding small amounts of lemon juice and/or confectioners’ sugar until you get the right consistency. Pour the lemon glaze over the top of each loaf and let it drip down the sides. Let the lemon glaze harden, about 15 minutes, before serving.
The glazed loaves will keep for up to 3 days, wrapped tightly in plastic wrap, at room temperature.

***Enjoy!
~ Misty

Wednesday, June 6, 2012

TIO Tuesday - Baked Chicken Ziti

Okay, apparently yesterday was Tuesday?! Yes, I'm a day late. I have gotten over it, I hope you can too. I just haven't coordinated my summer schedule yet, and I can't guarantee this won't happen again, but I hope it doesn't. Now that we have that out of the way!!!
I semi-sorta created this one. I had purchased some ziti pasta a while back, although for what recipe, I can't quite remember. Obviously that never came to fruition, hence the box of ziti waiting to be used. I also had left over shredded chicken in the freezer - as everyone should, truly a life saver. A quick search revealed many variations of the same, so I made up my own. It's very simple, not rocket science, but a nice change from spaghetti or lasagna.
1 box cooked ziti pasta
2 cups cooked, shredded chicken
1 jar pasta sauce (I used an Italian sausage and garlic blend)
1 can petite diced tomatoes, drained
2 cups mozzarella, plus more for topping
Season as desired. I used more oregano, garlic and Morton's Nature Seasoning.

Mix all, top with remainder of cheese, bake at 350 degrees for 30 minutes.

Yes, it was family and Brad approved!
Enjoy!
~ Misty

Tuesday, May 29, 2012

TIO Tuesday - Bacon Wrapped Asparagus

Recently I had the opportunity to try asparagus for the first time. I know, yet another rather common food that I haven't eaten. I always thought it was just one of those things I wouldn't like. I'm not sure there's a valid reason for it, other than I didn't eat it growing up. Well, long story short, Tara did an awesome job with the asparagus and I found that I do like it. Surprise, surprise!
I purchased a bunch of it this week, fully intending to make something fabulous with it. This wasn't what I originally had planned, but I will say it was pretty fabulous. I mean, you can't go wrong with bacon - right?! A little research and a video later, I taught myself how to prepare the asparagus. It's not rocket science, but being that I had never made it before, I wanted to do it right. The video was very helpful and the recipe was a winner. I did alter it a little to combine the two techniques.
So, starting with the asparagus, I rinsed the stalks and chopped off a little of the ends. As it mentions in the video, I peeled the ends slightly to get rid of the woodiness (is that a word?)
I drizzled  liberally doused them with olive oil, and sprinkled on a little grey sea salt.
After reading most of the reviews for the recipe, I decided to pre-cook the bacon a little so the finished product would be crispy. I put it in strips at 375 degrees for ten minutes then wrapped the bacon around the asparagus. The recipe calls for using half a strip of bacon, I would recommend using the full strip. By the time I had pre-cooked the bacon and then wrapped the asparagus, there wasn't much bacon left to go around the stalk, and that my friends should NEVER happen! I cooked them an additional twenty minutes as noted in the recipe.
Voila!

Bacon Wrapped Asparagus

Ingredients

    • 1 lb fresh asparagus
    • 8 -10 slices bacon

Directions

  1. Wash and trim asparagus spears.
  2. Cut bacon strips in half crosswise.
  3. Wrap one-half strip bacon around each asparagus spear, leaving tip and end exposed.
  4. Lay on a cookie sheet with sides.
  5. Bake in a preheated 400 degree Fahrenheit oven for 20 to 25 minutes, or until bacon is cooked.
  6. Serve warm or at room temperature.


Enjoy!
~ Misty

Thursday, May 24, 2012

Green Thumb?

Brad would say definitely not. I've been rather notorious for starting projects in the garden and not finishing them. When we lived in the country, I had high hopes of a beautiful large garden. I truly didn't realize how much work it would be, all the watering, watering, watering... And weeds too? When Brad came to the conclusion it wasn't going to work out like I had planned, he promptly mowed over the whole thing. Even the raspberry bushes I had transplanted. I was a little angry about it, but mostly relieved.
Fast forward three years, we're in our house in Cedar Falls, and we had a beautiful strawberry patch in the back yard. It was very prolific that first year and I had dreams of enjoying strawberries for the summers to come. However, Brad didn't like the large pieces of wood that surrounded and protected it (from being mowed over) so he took the wood away and you guessed it, mowed over the whole thing. Now that I was very upset about. I think that same summer I tried another garden with the same disastrous results.
So, we have two things working in tandem here. My inability to follow through with large parcels of garden and Brad's overactive desire to mow everything in his path.
My solution is to start small. I'm throwing this out there mostly to remain accountable. Anderson and I planted a few tomato and pepper plants this morning. I had to find somewhere that would be out of the way of Brad and his tractor. I decided on the back of the garage, after about noon, it gets full sun. It's not the best place, but at least it's reachable with a hose. I also guarded it with two big rocks. That should help?
 If you'll notice the dirt and "grass" around the plants, it's obvious, we can't grow grass either. To be fair, we haven't actually planted any seed in the back yard, but still, it does look sad. I'm really crossing my fingers that this works out. I can't wait to enjoy jalapeno poppers from my own "garden"!
~ Misty

Tuesday, May 22, 2012

TIO Tuesday - Doritos Cheesy Chicken Casserole

One of my favorite go-to websites/blogs is that of Plain Chicken. Her recipes are simple and family friendly. So what do you do when you try one of her recipes that she raves about, your family loves it, but you? eh, not so much. I guess, upon request, I would make it again. Maybe on a night where I wouldn't be home to eat it? Not to bash a good recipe, because obviously, there are those that really like it. I'm just being honest. With that being said, I still love her site and there are plenty of recipes that I'm still eager to try. Give it a shot and let me know what you think. Who knows, maybe it's just me?


Doritos Cheesy Chicken Casserole
3 cups cooked chicken, chopped (I used a rotisserie chicken)
8 oz sour cream
1 can cream of mushroom soup
1 can cream of chicken soup
1 1/2 cups salsa or 1 can Rotel
1 can of corn, drained
2 cups Mexican cheese, shredded
1 bag of nacho cheese Doritos

Preheat oven to 350 degrees.

Lightly spray a 9x13 pan with cooking spray. Crush the entire bag of Doritos and cover the bottom of the dish. Reserve one cup of cheese. Mix together remaining ingredients in a large bow. Pour chicken mixture over the Doritos. Bake for 20 min. Top casserole with the remaining cheese and bake 5 additional minutes or until melted.
***I used Rotel and regular co-jack cheese.
~ Misty

Tuesday, May 15, 2012

TIO Tuesday - Banana Cupcakes

We had another over abundance of bananas and I wanted to try something different from the usual banana bread. Anderson and I did a little research and decided to try the banana cupcakes. They were very similar to banana bread but much more moist and I love the smaller, easier to eat portion.
These are super easy to throw together, just in time for an afternoon snack.
I think they would look much nicer if they were frosted, but trust me, you don't need it. When I offered the frosting to the kids, they said they liked them just the way they were. You don't hear kids turn down frosting very often!Banana Cupcakes
Ingredients
  • 1/2 cup shortening
  • 1 1/2 cups sugar
  • 2 eggs
  • 1 teaspoon vanilla extract
  • 1 cup mashed ripe bananas
  • 1/4 cup buttermilk
  • 2 cups all-purpose flour
  • 1 teaspoon baking powder
  • 3/4 teaspoon baking soda
  • 1/2 teaspoon salt
  • FROSTING:
  • 1/2 cup butter or margarine, softened
  • 2 1/2 cups confectioners' sugar
  • 3 tablespoons milk

Directions

  1. In a large mixing bowl, cream shortening and sugar. Add the eggs, vanilla, bananas and buttermilk. Combine the flour, baking powder, baking soda and salt; add to banana mixture. Fill 18 paper-lined muffin cups two-thirds full.
  2. Bake at 350 degrees F for 15-20 minutes or until a toothpick comes out clean. Remove to wire racks to cool completely. In a small mixing bowl, cream the butter, sugar and enough milk to achieve desired spreading consistency. Frost cupcakes.


***The only change I made was using butter instead of the shortening, and no frosting.
Enjoy!

~ Misty

Tuesday, May 8, 2012

TIO Tuesday - The Best Chocolate Sheet Cake. Ever.

I have been wanting to make this sheet cake from the moment I read the recipe in the Pioneer Woman's Cookbook. I'm not sure why I waited so long, I've tried many other recipes from her book and website. Finally, I took the chocolate plunge. Sure enough, delicious. I'm not really sure there's much else to say about it. Just look at this gorgeous chocolate - WOW!
 Sprinkle a few pecans on top and you're good to go.
 Pairs nicely with a strawberry mojito, don't you think?

The Best Chocolate Sheet Cake. Ever.

Ingredients

  • FOR THE CAKE:
  • 2 cups Flour
  • 2 cups Sugar
  • ¼ teaspoons Salt
  • 4 Tablespoons (heaping) Cocoa
  • 2 sticks Butter
  • 1 cup Boiling Water
  • ½ cups Buttermilk
  • 2 whole Beaten Eggs
  • 1 teaspoon Baking Soda
  • 1 teaspoon Vanilla
  • _____
  • FOR FROSTING:
  • ½ cups Finely Chopped Pecans
  • 1-¾ stick Butter
  • 4 Tablespoons (heaping) Cocoa
  • 6 Tablespoons Milk
  • 1 teaspoon Vanilla
  • 1 pound (minus 1/2 Cup) Powdered Sugar

Preparation Instructions

Note: I use an 18×13 sheet cake pan.
In a mixing bowl, combine flour, sugar, and salt.
In a saucepan, melt butter. Add cocoa. Stir together.
Add boiling water, allow mixture to boil for 30 seconds, then turn off heat. Pour over flour mixture, and stir lightly to cool.
In a measuring cup, pour the buttermilk and add beaten eggs, baking soda, and vanilla. Stir buttermilk mixture into butter/chocolate mixture. Pour into sheet cake pan and bake at 350-degrees for 20 minutes.
While cake is baking, make the icing. Chop pecans finely. Melt butter in a saucepan. Add cocoa, stir to combine, then turn off heat. Add the milk, vanilla, and powdered sugar. Stir together. Add the pecans, stir together, and pour over warm cake.
Cut into squares, eat, and totally wig out over the fact that you’ve just made the best chocolate sheet cake. Ever.

*** Seriously, what are you waiting for???!!!
~ Misty

Tuesday, May 1, 2012

TIO Tuesday - Basic Alfredo Sauce

I have been reading a book that is completely changing my perspective on cooking, and in turn what I eat. I just happened to check it out from the library and I'm so glad I did. It reads like a memoir of sorts but it's also a how-to type cookbook. It's kind of hard to explain, but trust me, it's different from any other book I've read.
The author, Kathleen Flinn, is a food writer and graduate from Le Cordon Bleu in Paris. A quick, basic description of the book: Her experience using nine volunteers and teaching them how to cook. Their ages and backgrounds are all different, but they range from mid-twenties to forties. All of them have different reasons for not cooking, mostly being afraid of the kitchen or simply not knowing how to cook. Naturally, the book jacket does a better job of enticing readers, but even if that's what I had read, I would have been interested.
In the whole scheme of things, I consider myself to be an okay home cook. I can follow a recipe, but rarely do I try my own thing. My palate is woefully inadequate and, I believe, prevents me from being a better cook. Her book is giving me the confidence to get back to basics and really evaluate how I can be a better cook, a better provider for my family. From one of the first chapters on knife skills, to her pasta and sauces, I have learned something new. That brings me to today's TIO - Basic Alfredo Sauce.
I typically don't make Alfredo at home, from a box, jar or otherwise. I don't know how to and the thought of screwing it up and having to start over is rather daunting. Ordering an Alfredo at a restaurant is hit or miss. Sometimes, I like it and sometimes, it's awful. It just seems to be difficult? After talking with a few friends, I found that consensus to be true for them as well.
So, last night, I told the girls I would make them pasta for dinner. We were having chili and the kids don't like it, so I made this for them. Normally, I don't make two different dinners, but I really, really wanted chili! I digress...
A quick note: After a little recipe research on the Internet, the basic skills to make a homemade Alfredo have not escaped everyone. There are thousands of recipes and cooks out there that sound like they make a pretty good one. For me though, this worked and I would be thrilled if you tried it out yourself and let me know what you think.
Recipe from the book, The Kitchen Counter Cooking School
All the necessary ingredients, minus the pasta water
Looking for the bubbles! Be patient, they will come
Finished product with mini-penne pasta.
Looks like I lost a little guy under the pan?
This sauce was so creamy and delicious, my family raved about it. Brad said it was far better than the frozen Alfredo he used to buy and the kids said it was better than anything that comes in a box. I can't wait to make this again using fettuccine and chicken. You will probably see more recipes inspired by this book. Let me know what you think!

Adapted from book, page 142

8 oz. cooked pasta
2 cups heavy cream (2 tbsp. reserved)
1/2 tsp salt
1/2 cup grated Parmesan cheese
1 clove garlic, minced
Freshly ground black pepper

Prepare pasta according to package directions. Carefully reserve one cup of the pasta water to use in the sauce. Over medium high heat, add all but 2 tbsp of the cream to a saute pan or skillet. When it bubbles, add the salt. Small bubbles will erupt into larger bubbles. Stir. When the sauce thickens enough to cover the back of a spoon or leaves a clean line in the bottom of the pan when you pull a spatula across it, add the pasta water. Cook over medium high heat for about 3 minutes, until it bubbles again and the sauce thickens. Add the reserved 2 tbsps. of cream, heat through and then add the cheese, garlic and a few cranks of pepper. Taste, and add more salt if needed. Add the cooked pasta and any additional ingredients and stir well to coat.

Enjoy!!!
~ Misty

Monday, April 30, 2012

Doors and More~

We've been busy getting the rest of the doors hung this past weekend.  Well, that should be phrased as Brad has been busy. I'm not really a door-hanger type gal. We do still need to do trim and that's where my part comes in. Brad has neither the patience or time to do the trim, so I get the honors.

 Piper's room, on the left, now has a door. This is a huge deal, she can now take a nap in her own room instead of the playpen in my bathroom which was the quietest part of the house. Closet doors are hung and ready for trim as well. All the doors still need to be painted, again, I get the honors.
Another hurdle was getting the railings done on the stairs and carpeting. It's sooo much quieter now. I wish I had half the energy of my children. They go up and down, up and down, up and down, you get the idea. 


All of the kids now have their own beds. We bought three yesterday to finish off the kids' rooms. We are still working on headboards and dressers. The girls got some of their things hung on the walls and are so excited to have their own spaces. Closet doors still need to be hung, right now, I'm just glad the majority of their clothes are off the floor.
Brad is working on the kids' bathroom today. Getting all the tile done around the shower, including the built-in shelves for each child.  He chose this layout for the floor, because you know nothing is ever simple for him. I think we are doing the wainscoting on the wall in white. It will be nice to have another bathroom area done. It's getting a little tight in the half-bath lately. 
And finally my laundry room door. Some might say it's small, I like to call it cozy. 

~ Misty

Tuesday, April 24, 2012

TIO Tuesday - (Smoked) White Chicken Enchiladas

I had a craving for enchiladas but didn't have enchilada sauce. I had seen several recipes that were for a "white" enchilada and figured I probably had the ingredients necessary so I did a little research on pinterest and found that quite a few of the pins were for the same recipe. Sure enough, I had what I needed. The "smoked" part of the title is from the smoked chicken I used. I had made a chicken in the smoker the night before and had quite a bit left over that I thought would work for this recipe. However, the smoked taste completely overpowered the dish. It was still really good and I will definitely make it again, just with plain chicken next time.
 I used a large square dish for this and overloaded each tortilla to fit. Of all the kitchen stuff I have collected to replace what I lost, I only have one 9x13 pan. How is that possible? I've got a gazillion bowls, serving dishes and pie plates, but only one pan? Yay for garage sale season, I'll definitely be on the lookout!
This is my plug for this cheese, it's fantastic! It has a nice spiciness to it and I used it on the side of the enchiladas for Brad and I. I also use this cheese in scrambled eggs. Once you try it, you just can't use the plain stuff anymore! Oh, and don't get me started on cheesy hash brown potatoes!

Finished dish, nice and cheesy. You can see the specks of jalapeno on one side, the rest was just co-jack. I've never made the sauce for this before, but it tastes just like a white-queso dip. I tried some with tortilla chips and it was great, I think the sauce by itself would be nice to serve as a dip?

White Chicken Enchiladas
8 flour tortillas, soft taco size
2 cups cooked, shredded chicken (I used half of a rotisserie chicken)
2 cups shredded Monterey Jack cheese
3 Tbsp butter
3 Tbsp flour
2 cups chicken broth
1 cup sour cream
1 (4 oz) can diced green chilies

Preheat oven to 350 degrees.

Spray a 9x13 pan with cooking spray. Mix chicken and 1 cup cheese. Roll up in tortillas and place in pan seam side down.

In a small sauce pan over medium heat, melt butter. Whisk in flour and cook 1 minute. Add broth and whisk until smooth. Allow sauce to thicken. Remove from heat and stir in sour cream and chilies.

Pour sauce over enchiladas and top with remaining cheese. Bake 20-25 minutes and then broil for a few minutes to brown the cheese.
Enjoy!
~ Misty

Tuesday, April 17, 2012

TIO Tuesday - Apple Crescent Surprise

I think this recipe has a variety of names. I found it by typing in "apple" and "crescent". I just knew there had to be some sort of yummy recipe that combined the two, and I was right! I found it also listed as Apple Dumplings. I read through a few of them and with the exception of the type of soda used, they were basically the same recipe. One even mentioned that Pioneer Woman has it on her blog, just another reason to love her!
Anderson was the lucky one to help today. I've timed them to be done about the time the kids roll in from school. The house is smelling wonderful!!!
Butter, sugar, cinnamon - how can you go wrong?


It's rather difficult to get this guy to look at the camera and smile while cooking,
but he made an effort - baby steps

All done!
Apple Crescent Surprise

Ingredients:
2 cans crescent rolls
2 Granny Smith apples, peeled and cored (I use whatever I have in the house)  
2 sticks butter, melted
1 1/2 cup sugar
1 tsp cinnamon 
1 can (12 oz) ginger ale

Directions:
Preheat oven to 350 degrees Fahrenheit.
  1. Cut each apple into 8 wedges.
  2. Open crescent rolls, place apple wedge in each one. Roll up.
  3. Place in 9 x 13 pan.
  4. Melt butter, add sugar and cinnamon.
  5. Pour over crescent rolls.
  6. Pour ginger ale on top.
  7. Bake 45 minutes until golden brown.
  8. Serve with vanilla ice cream or whipped cream.
***My notes- I made this as directed, but only used 1 cup of sugar. I think it could be cut back even more and, dare I say it, cut back on the butter. These were swimming in the sauce. And yes, they were delicious!
Enjoy!

~ Misty

Tuesday, April 10, 2012

TIO Tuesday - Pulled Chicken Suiza

I had the opportunity to have friends over for lunch last week two days in a row. I love it! I've waited so long to be able to do this and it falls in line perfectly with finding new recipes to try. In the event that a recipe doesn't turn out though, Casey's is right down the street. Fortunately, I haven't had to go that route - yet?!
One of my new favorite phrases is "I'd pay money for this!" I've been able to say it a few times and this recipe was one of them. It has a taste that is unique to anything I've ever tried before. My friends all liked it and I encourage you to try it as well.
The picture of what I made above, hers at Let's Dish below.
Filed under Main Dishes
Ingredients
1 tablespoon extra-virgin olive oil
1 small red onion, chopped
2 cloves garlic, chopped
Juice of 1 lime
1 tablespoon honey
1 1/2 cups store-bought salsa verde
1/2 cup sour cream
1 rotisserie-style chicken, skin discarded and meat shredded
4 crusty sandwich rolls, split
4 slices Monterrey Jack or cheddar cheese

Directions
Preheat the broiler. In a large skillet, heat the olive oil over medium-high heat. Add the onion and garlic and cook until softened, about 2 minutes. Stir in the lime juice and honey, then stir in the salsa and heat through. Mix in the sour cream. Stir in the chicken to coat. Pile the chicken mixture on the roll bottoms. Top with the cheese and broil to melt. Set the roll tops in place and serve.

Let's Dish
This has to be one of the easiest, tastiest meals I've put together. Once the chicken is shredded, it takes less than 15 minutes. And everyone loves it! The honey and lime add wonderful flavor. If you have extra filling, it makes great burritos the next day.

Who Dished It Up First
This is a Rachael Ray recipe that I found over at Cassie Craves.

*** Misty's notes: I didn't have shredded chicken, so I used chicken breasts that I cooked and chopped  up to put in the sauce. I used Ciabatta rolls and Monterrey Pepper Jack cheese. I did butter the rolls prior to putting it in the broiler. I had plenty left over for Brad later and me the next day, so I would recommend having extra rolls on hand. So yummy!
Enjoy!
~ Misty

Sunday, April 8, 2012

Happy Easter

It's been a beautiful Easter weekend.  It's the first Holiday that we have spent in our new home and it's awesome! We all made it to the early service at church, even Brad went with us. We headed to Oelwein to spend the morning with the Block family and wrapped it up with the Hurley side here at our home. The kids were thrilled with all the egg hunts, presents from the Easter Bunny and both grandparents.  Now we're in that sleepy post-food state, on the edge of falling asleep with our comfy clothes on. Before that happens, I thought I would put up a few pictures of our day.
 Happy Easter from all the Block's!

I loved this picture of Piper. I am playing around with the coloring a little bit for a future project.
If you think trying to get my five to smile nicely is a chore, try it with all the Block kids, not even a chance a good picture would come out of it. 
Back at home, the girls thought it was warm out (they're crazy) but, it's Easter, so we let them wear what they wanted. 

~ Misty